
Initiate a pipeline with custom triggers and Azure Event Grids
Introduction
Data pipelines are increasingly being used throughout organisations to provide data to different applications.
Data is created in numerous places, both within and outside of the organisation, in the cloud and on-premise and the need to handle complex scenarios are increasing. Reasons can be security and architectural considerations, a company’s ownership structure or just legacy. In order for data to flow in a timely manner, pipelines need to be capable of triggering other pipelines while preferably sending supplementary information like folder paths or file names. This blog post covers such an event-driven approach on an Azure environment.
More precisely, we present a walk-through on how to use Azure Event Grid’s custom triggers to initiate a pipeline run from a different Azure Data Factory.

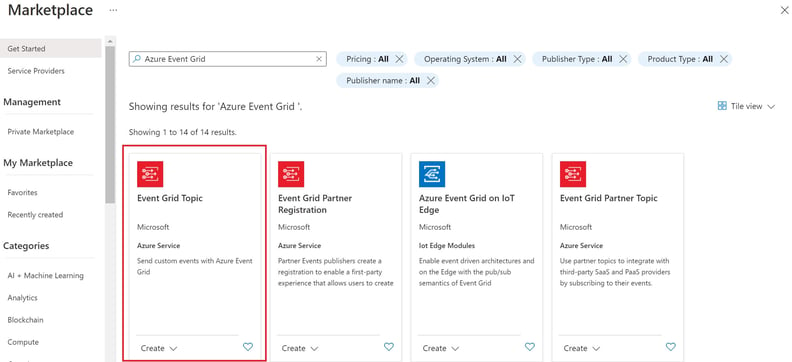
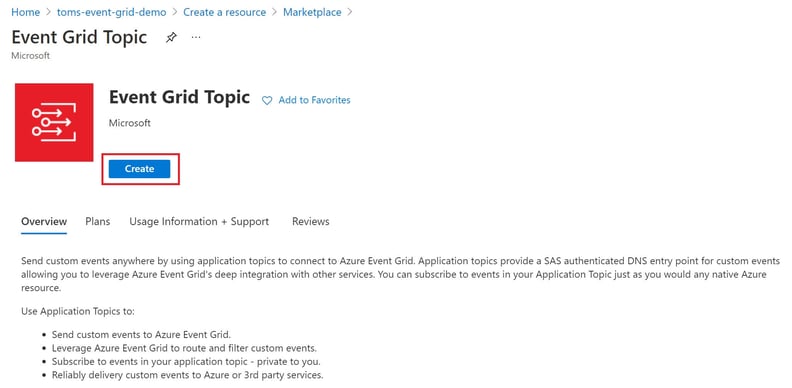
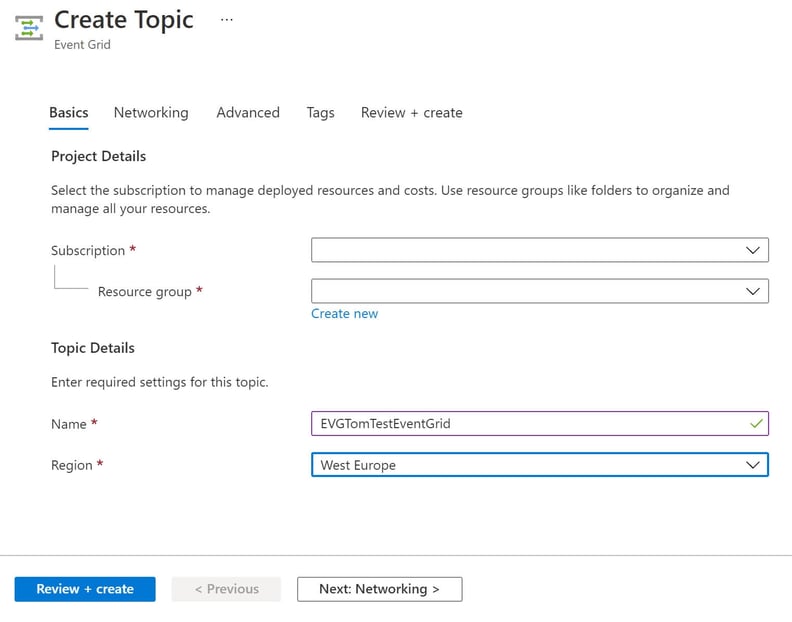
1. Create an Azure Event Grid Topic resource
To start off, we need to create an Azure Event Grid Topic resource in Azure.
a) Search for the Azure Event Grid resource in Azure Marketplace and click create
b) Fill in the fields and press Review + create
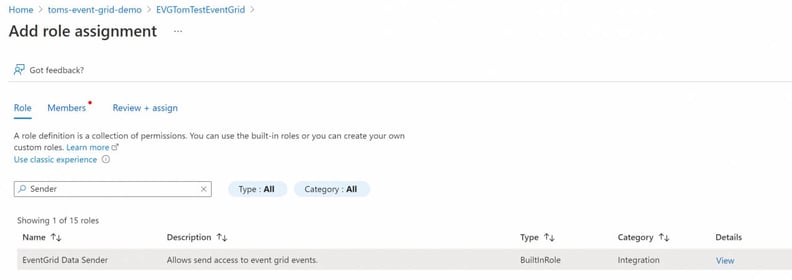
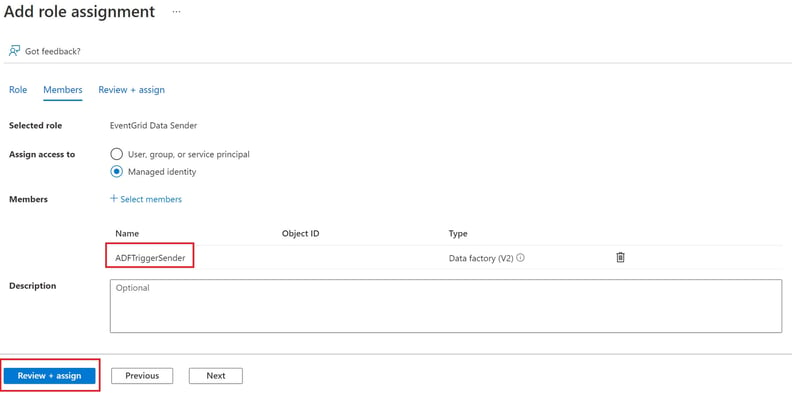
2. Add ADFTriggerSender to the role EventGrid Data Sender in Event Grid
In this step, we add the managed identity of the data factory ADFTriggerSender to the role EventGrid Data Sender in Event Grids Access Control.
a) Go to the created Azure Event Grid resource > Access control (IAM) > + Add > Add role assignment
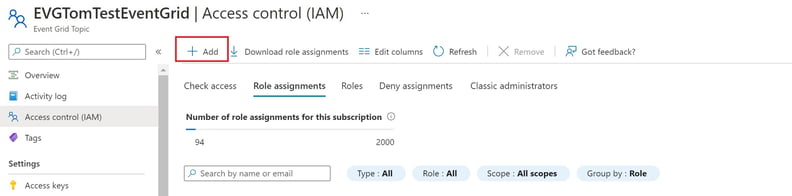
b) Search for the EventGrid Data Sender role and, pick Managed Identity and the ADFTriggerSender data factory. Press Review + assign
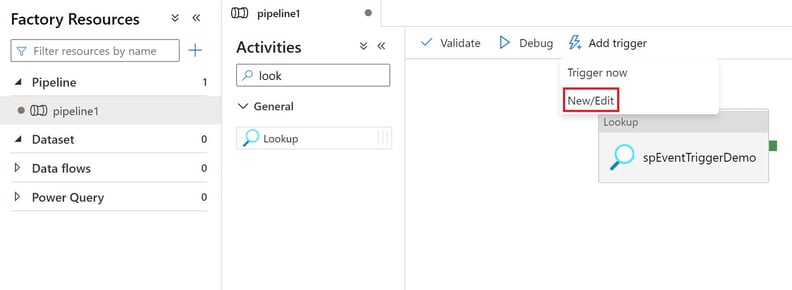
3. Create Event Subscription in data factory ADFTriggerReceiver
Now, we need to create an event subscription in ADFTriggerReceiver.
a) Go to the pipeline and click Add trigger > New/Edit > + New
b) Fill in the field Name, select Custom events as Type, find the Event grid topic name in your Azure subscription and create a new Event type
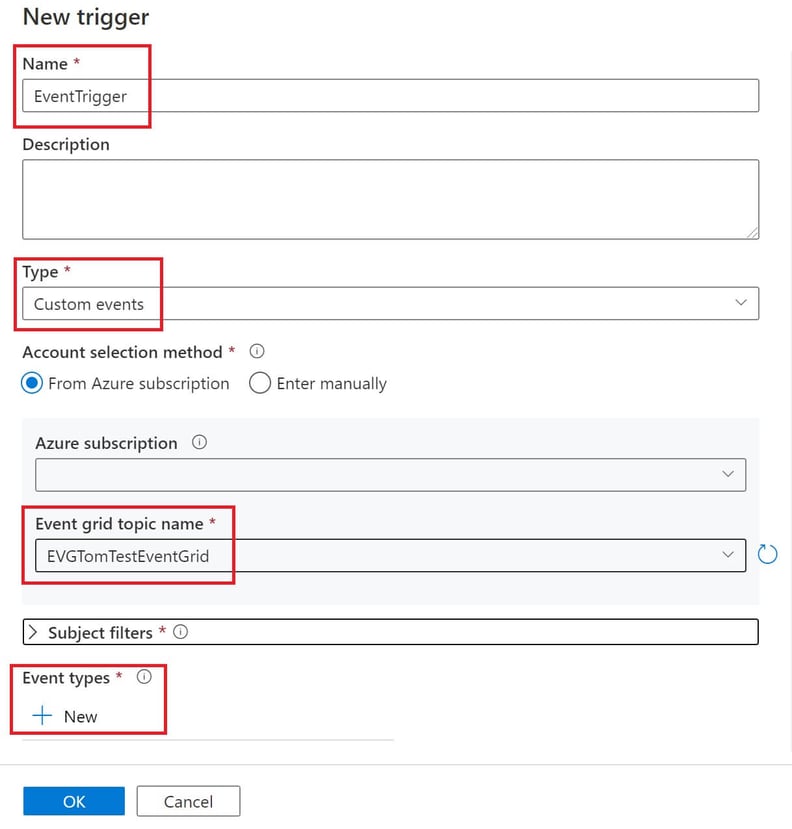
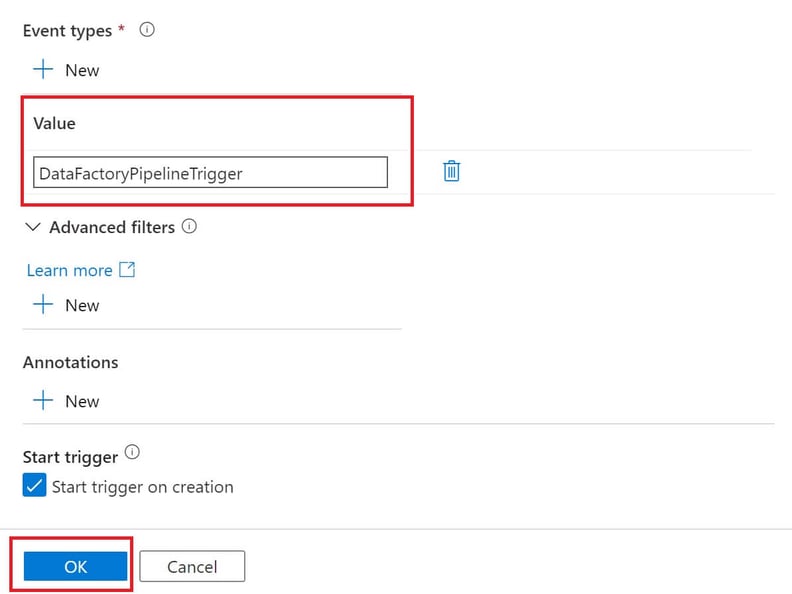
c) Our pipeline expects three parameters “whichADFTriggeredMe”, “whichPipelineTriggeredMe” and “whatsYourMessage” which, in turn, are forwarded to the stored procedure. These parameters are just used for demo purposes. The point is to show the general syntax is @triggerBody().event to receive customized information from the trigger call.
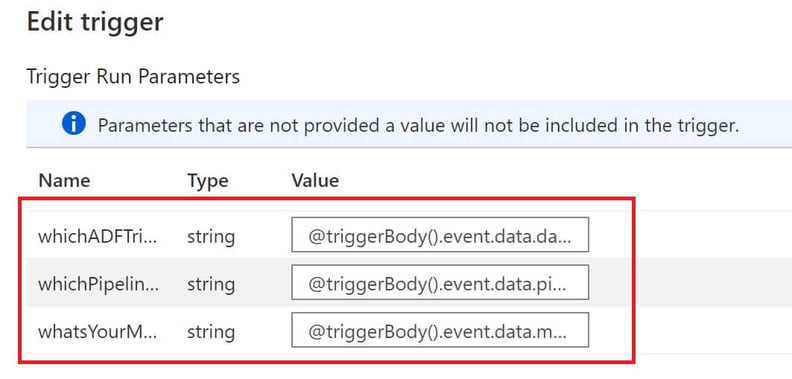
The parameters are:
whichADFTriggeredMe = @triggerBody().event.data.dataFactoryName
whichPipelineTriggeredMe = @triggerBody().event.data.pipelineName
whatsYourMessage = @triggerBody().event.data.message
Note: In order for the Custom Event Trigger to be created in Event Grid, you need to publish the data factory.
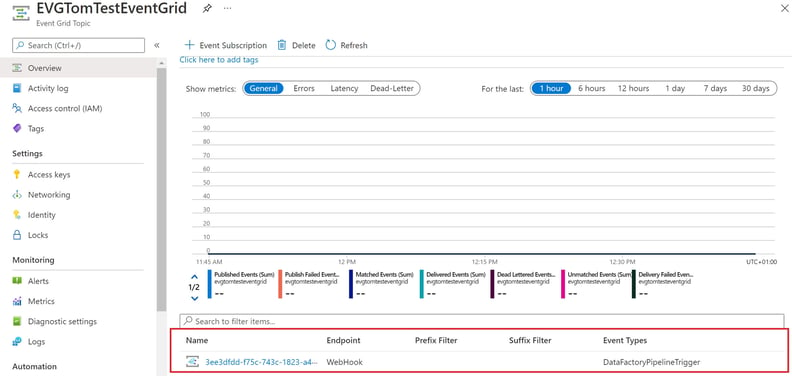
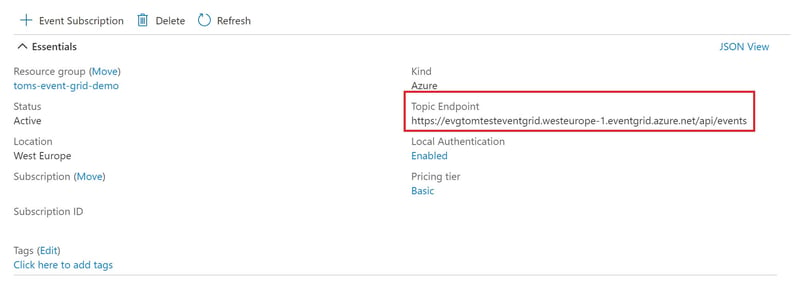
If we go back to the Azure Event Grid resource, we can see our Event Subscription created by ADFTriggerReceiver:
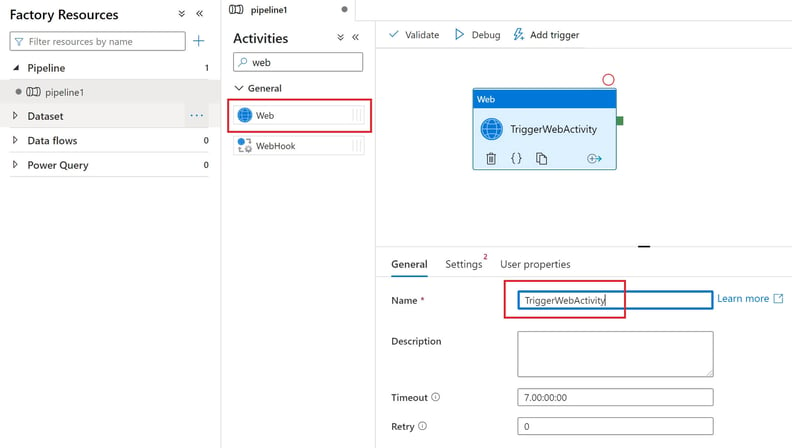
4. Create “trigger” web activity in ADFTriggerSender
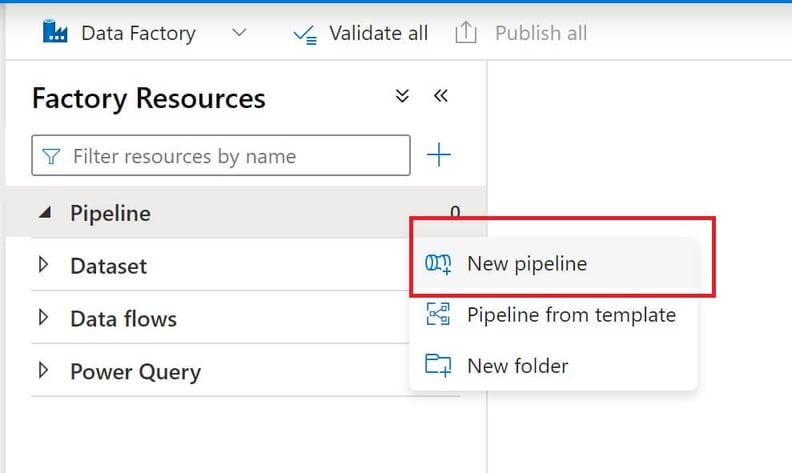
a) Create a new pipeline, drag in a Web activity, and give it a name
b) Fill in the fields URL, Method, Body, Authentication and Resource under Settings
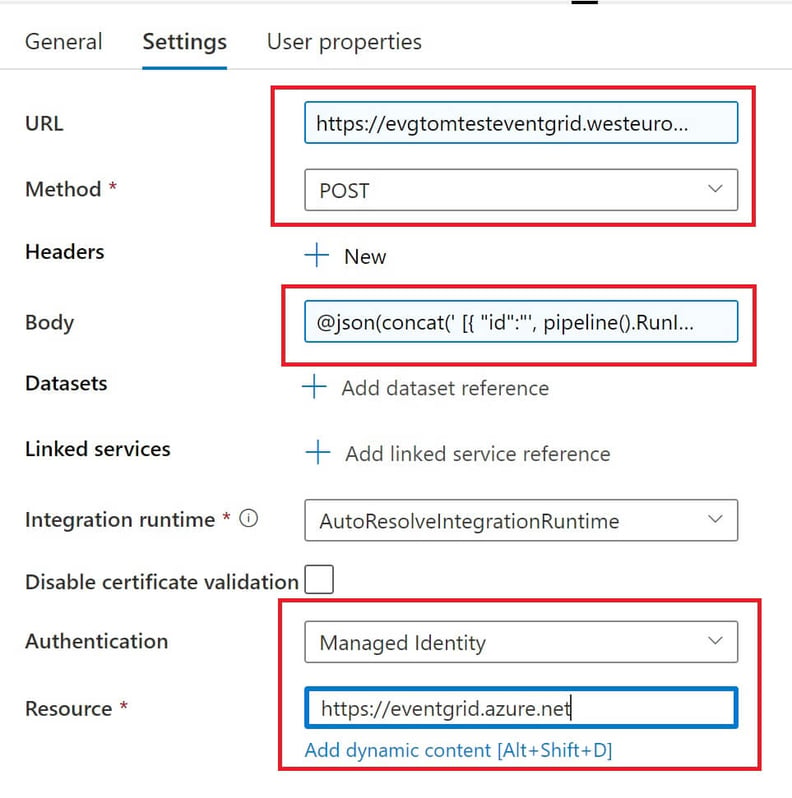
The URL can be found in the Event Grid Topic resource overview
This URL string needs to be appended with “?api-version=2018-01-01”, which in our case leads to the following URL:
https://evgtomtesteventgrid.westeurope-1.eventgrid.azure.net/api/events?api-version=2018-01-01
The json body looks like this:
@json(concat(’[{”id”:”’,pipeline().RunId,'”,”eventType”:”DataFactoryPipelineTrigger”,”subject”:”DummyUseThisForFiltering”,”eventTime”: ”’, utcnow(),'”,”data” : {”dataFactoryName”:”’,pipeline().DataFactory,'”,”pipelineName”:”’,pipeline().Pipeline,'”,”message”:”HelloWorld”},”dataVersion”: ”1.0”}]’))
Note: The id must be unique for every trigger run and the eventType needs to be the same as created in step 3b. The “data” part is referenced by the parameters in the trigger in ADFTriggerReceiver and can be customized at choice (see 3c).
Lastly, select Managed Identity as Authentication and fill in “https://eventgrid.azure.net” for Resource.
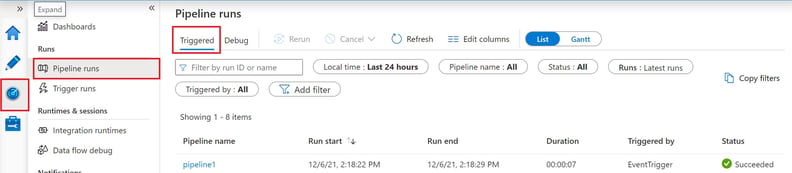
5. Debug the pipeline and check whether the custom trigger works as expected
a) Click debug to start the pipeline1 in ADFTriggerSender
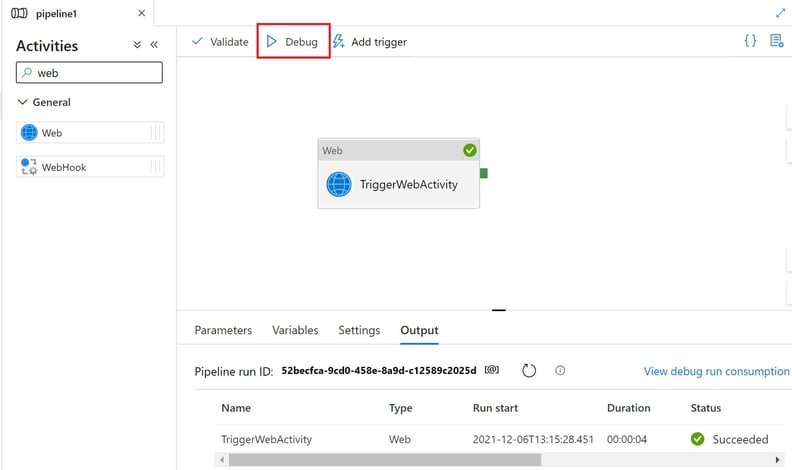
b) Check the logs in ADFTriggerReceiver
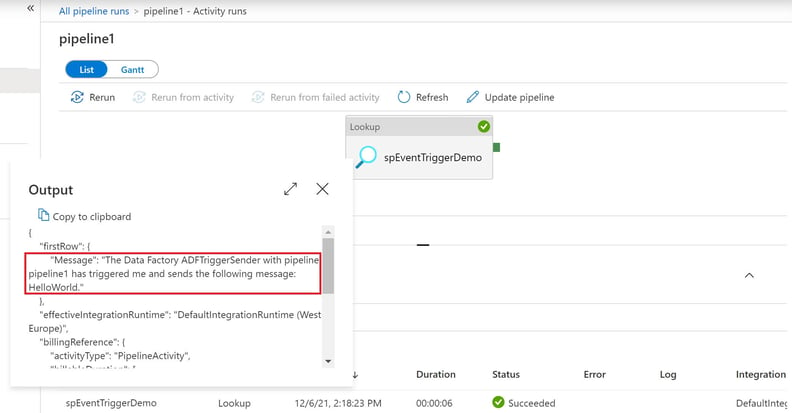
Conclusion
As seen in the last screenshot, the referenced parameters from the trigger can further be used in the next pipeline. This ability to exchange all sort of information via the body of the trigger call, makes this approach extra powerful. Finally, due to the managed identity authentication method neither key vaults nor rolling access keys are required.
Author: Tom Oefler
Business Intelligence Consultant at Random Forest
Related
Is Data Lake the future of analytical data platforms? (Swedish) https://www.randomforest.se/datalakehouse-framtiden-dataplattformar/
Migration strategy for analytical platforms (Swedish) https://www.randomforest.se/migreringsstrategier-for-analysplattformar/